Help: User Administration
Overview
Customer can have multiple users associated with their accounts. In fact it's best practice to have each person who is accessing the website have their own username and password. If you are sharing a user, there is the risk of running into conflicts.
The first person who was assigned to the customer account was setup as an administrator who can setup other users. You can even setup additional administrators who can also add users.
Accessing User Administration
User Administration is available from the main navigation bar under the "My Account" menu. You must be signed in in order to see the My Account Menu and you must be an Administrator to view, edit, create, and inactivate users.
- Click on My Account.
- Select User Administration.

- The User Administration Main Page is displayed

- The Main Page contains the following items:
- The Search button will open the Search form.
- Page navigation to navigate to multiple pages of when there are a lot of users.
- The user list.
- Clicking on the various column headings that are in blue will sort the list by that column.
- Clicking on a user's name will allow you to edit that user.
- The Create New User button to create a new user.
Creating Users
To create a new user click the "Create User" button (#4 in the image above). This will display the "User Setup" form as shown below.

To setup a new user do the following:
- # 1 - 4 Enter the username and user details in the fields labeled 1 - 4. The username must be unique across all customers so best practice is to use and email address but that is not required. Note: the email address is used to activate the account and for password recovery so make sure it is valid.
- #5 Make sure the "Send Activation Email" is checked. This will send the new user and activation email that will link them to the site in order to create a password for their new user.
- # 6 Select a role. The site allows for multiple roles as follows in the order of highest level of access to lowest:
- Administrator: Can do everything on the site including setting up new users.
- Buyer3: Can do everything on the site, including placing orders but cannot setup new users.
- Buyer2 and Buyer1: Cannot setup new users. They can place items in shopping carts but instead of submitting their shopping cart as an order or quote, they submit the cart for approval by the user designated in #7. Order approval is covered in more depth in the Help: Ordering section.
- Requisitioner: A requisitioner cannot order and does not submit shopping carts for approval. Requistioners can request items to be purchased but they get added to a long list of items and are not saved with any cart features like PO numbers. This role is good for employees who need the site for price and availability but not ordering
- # 7 Assign and approver. If you have assigned the new user to be a Buyer2 or Buyer1 you will need to assign them an approver who will see and approve their shopping carts. This is covered in more detail in the Help: Ordering section
- When you are done click the "Create User" button. An activation email will be sent to the email address you assigned in step #4 with a link for the new user to create a password. A message will appear at the top of the page that an activation email has been sent to the new user.

- Here is a sample of the email message:

- Here is the "Account Activation" page that appears after the new users clicks the "Activate Account" button

Updating or Deactivating Users
From the User Administration Main Pager you can select users to update their information.
To delete users you must uncheck their "Active" status, there is no delete function but without the "Active" status the user will not be able to sign in. See Step 3 below.
User Update / Deactivate Steps:
- To select the user you wish to update, click on the Username
- This will display the "User Setup" page.
- You may update any of the available fields.
- NOTE: to deactivate a user, click the "Active" check box in the "Status" section to uncheck it. This is the method to deny access to a users. There is no delete capability.
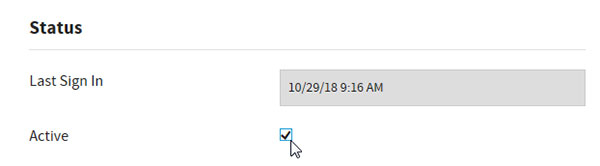
- NOTE: to deactivate a user, click the "Active" check box in the "Status" section to uncheck it. This is the method to deny access to a users. There is no delete capability.
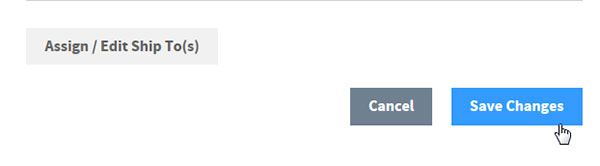
- When finished, click the "Save Changes" button at the bottom of the page